If you use CourseSites as the LMS for your coming semester, please be reminded that you will need to “invite” students to your course, and students will need to “confirm and register” to be able to get in to the course. In a way, this works like friend request in Facebook or connections request in Linkedin. To invite students, go to the control panel of your course, find “users and groups” and then click on “users”. Click on “invite” to start your invitation.
Here are a few suggestions to make the process smoother:
1. Instead of typing all student email, copy all students’ email. To do so, go to MyACU, find your class, go to the class roster, and try sending email to “all” to launch an email window. Before sending any real mail out, just copy all the email from the “to” field. Open a blank Word document and paste these addresses. Use Word’s “replace all” function to replace “edu” with “edu,”, as CourseSites invitations require commas to separate email addresses. Then copy and paste it to the receivers’ field in CourseSites’ invitation email when you invite.
2. If a student encounters an error in accepting the invitation, ask him or her to clear cache. You might want to send link of this Wiki article: http://www.wikihow.com/Clear-Your-Browser’s-Cache to help the student learn how to clear cache.
3. If that still does not work, ask the student to switch to a different browser and try again. I asked CourseSites support which browsers work best, they said they would recommend Firefox. They found that the lower versions of Internet Explorers give more issues. Students may need to update to a higher version of IE before accepting such invitations, or use another browser for this purpose.
4. In some cases you may need to re-send the invitation if students find the link does not work.
5. You can send a second invitation only to those who have not accepted your invitation. To do this, go to “check invitation status” , and click on “invitation status” to sort students by those who have accepted and those who have not. This way all students who have not accepted the invitation will be listed together for easier selection. Check the boxes besides their emails and click on “send invitations” to resend your invitation.
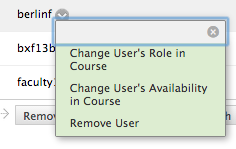
6. As semester goes on, students will be added or dropped from your course, for added students, just send a new invitation. For dropped students, you can remove them. But to be safe I would choose to make them unavailable in the course during the semester, if there is any possibility of them being re-enrolled in the course. To make someone unavailable, go to “users and groups” on the control panel, choose “users”, find the user and click on the edit button that appears when you mouse over the name, click on “change user’s availability” in the course and then choose “no” for “available (this course only).”
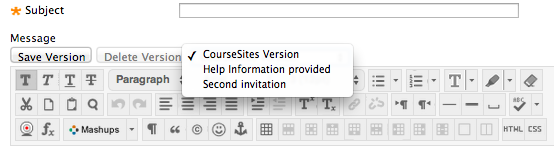
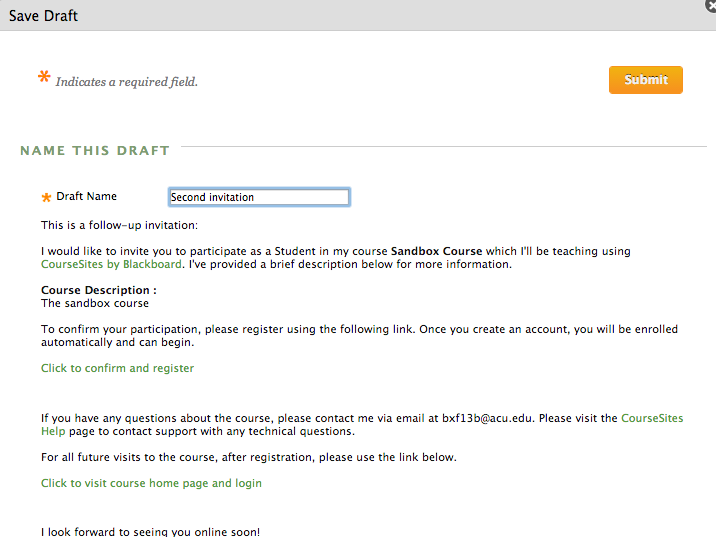
7. Save your invitation drafts. CourseSites has also added a feature to save your customized invitation message. Usually you get a default message. Feel free to use that if it suffices. However there are times you need to customize the message for various reasons. As you do so, please do not change the highlighted links. Also, consider saving each version of your invitation, which will save you much time. Do NOT copy such messages between courses as each course has a specific link. Overwriting such links by pasting the invitation message from another course may cause a lot of confusion and make it inefficient for you to manage your enrollment.
Once you finish adapting your invitation message, save it under a name that you will recognize in the future.
After you have saved your version of the invitation letter, you can choose a version of your invitation letter from the drop-down menu, as shown below, if you need to send another invitation letter.