Brandon Young's Archive

DSGN 242: Project 4 – Empty Nest Condominium

0 Commentsby   |  11.14.11  |  Assignments, DSGN 242

Objectives

The student will investigate and implement a design solution with regard for:

  • Exploration of options for renovation of an existing space into a mixed-use environment
  • Identification of client needs and development of a problem statement
  • Functional aspects related to needs for “aging in place” and the elderly
  • Efficiency aspects within an office in which functionality and aesthetic responses reflect the particular client scenario
  • Unique structural and building system parameters of a high-rise environment
  • Conceptual development of stylistic preferences specified by the client
  • Development of a multipurpose commercial space that showcases a notable anthropology career shared with a non-profit service endeavor
  • Creation of lighting and electrical plans supported by legends that serve specific needs of the client
  • Compilation of a presentation in a bound format

Assignment

Client Profile

Mr. & Mrs. Juan Javier Alvarado Jimenez have hired you to assist them with the development of a design solution in which the couple’s current residence in Santa Barbara, California will be renovated into a living and gallery environment. Mr. & Mrs. Alvarado Jimenez’s children are grown and each has a family and home of their own in the same city. In the design, the couple asks that you reconfigure and divide the current living space to combine residential living with an office-like space. Mr. Alvarado Jimenez is retiring from his work as an archeologist, and he wishes to showcase and share his personal collection in an office/gallery setting within the condo. For some time now, he has had increasing health difficulties due to his age (75) and diabetes. Re-establishing his office adjacent to the living space will allow him to eliminate monthly lease fees for his current office space.

Mr. & Mrs. Alvarado Jimenez are native Argentinians and are passionate for their homeland. Mrs. Garcia de Alvarado (Cecilia) is an active supporter of non-profit charities and foundations who assist the homeless in producing and selling their own artwork. She plans to showcase some of the artwork in both the living and office environment. The office space will provide a space in which Cecilia can easily share her husband’s part-time personal assistant. Additionally, both of them will be able to host events and receive guests in the general office space for meetings and small social gatherings.

Because this is a high-rise, the exterior of the building must maintain its cohesive integrity. The 8th floor apartment looks out on a view of the California coastline. The couple anticipates an aesthetically pleasing design solution that accommodates the unique purposes of each space and their preference for showcasing their personal interests and style.

Criteria for Living Environment (consider “aging in place” needs)

  • Private Entry – branch off common elevator lobby
  • Living Room – seating for four (min.), tables, collectibles (a TV is not needed and electronics should be placed inconspicuously within cabinetry)
  • Kitchen + Dining – minimal kitchen and dining for two; appliances needed: wall oven, cook top, small refrigerator, microwave and dishwasher; adequate storage space; trash disposal bins are located in the common area beyond the tenant space
  • Master Suite – Queen-size bed, bedside table(s) or cabinet surface, 6′-0″ dresser, chest, relaxed seating for two, closet space with 10 linear feet of single rod and 7 linear feet of double rods, personal vault for valuables
  • Master Bath – tub/shower, toilet, double vanity, linen and toiletry storage
  • Laundry – a compact laundry is requested, provide small washer and dryer, minimal household supplies, compact ironing/steam equip.

Criteria for Office Environment

  • Separate Entry – branch off common elevator lobby, develop with attention to professional ambiance
  • Office Space for Personal Assistant – desk with adequate work space, computer/monitor/keyboard/printer, telephone, fax machine, four-drawer lateral file (x1), desk chair, inconspicuous business supply storage
  • Multi-Purpose Waiting, Conference and Socializing Room – spacious, include a movable table and seating for up to four, showcase art from Mrs. Alvarado Jimenez’s charity work Mr. Alvarado Jimenez’s archaeological collection in a gallery-like setting
  • Executive’s Private Office – eight linear feet of shelving, standard executive desk, telephone, two-drawer lateral file (may be combined with credenza unit), desk chair and comfortable guest seating for one
  • Non-Profit Office Accommodations – standard desk accommodations with 4′-0″ of shelving and one vertical file, desk chair, telephone, laptop computer, printer, one guest chair and a 3′ x 4′ closet for storage of various items related to her volunteer work
  • Coat Closet and Mini Refreshment Station (concealed)
  • Powder Room – toilet, lavatory and minimal storage; though small, this room should be interesting and ADA accessible

The Building

  • Ten-story steel structure with windows on all sides
  • Entrance to the eighth floor tenant space is via the elevator, which opens into both the parking garage and the building lobby. A fire exit is located within close proximity of the tenant space as well.
  • Existing windows must remain as indicated on the floor plan. New walls may intersect at window mullions.
  • Plumbing should back up to walls with marked plumbing chases or branch overhead from a plumbing chase.
  • Windows are operable. Glazing is from the ceiling down to 1′-6″ A.F.F. (above finished floor).

The Interior

  • New interior walls are 3 5/8″ metal studs with 5/8″ gypsum board on both sides (for purposes of this project, draw new interior walls at 5″ thick).
  • The floor is structural concrete and cannot be punctured.
  • The existing ceiling height is 9′-10″ A.F.F., which will remain as the maximum ceiling height.
  • There is a 2′-0″ plenum space for HVAC, electrical, sprinklers and lighting above the ceiling.
  • The bedroom shall have an operable window in an exterior wall for fire safety.
  • All doorways and each bathroom/restroom must be wheelchair accessible.

Required Process Documentation:

Final Deliverables

Presentation Materials:

The following requirements to be assembled in a n 11″ x 17″ spiral-bound booklet (link to template is below under “Resources.” Each student will submit a printed and bound copy as well as a digital version (saved as a PDF – see below for details).

  • Written Problem Statement – describe the client’s needs and requirements
  • Design Concept Statement – describe the proposed solution and its ability to meet the client’s needs and requirements
  • Design Concept Imagery – assemble visuals (either digitally or physically) that portray the design concept direction for the living and office spaces (one page for each)
  • Design Process – clearly illustrate the design process, visuals can include: bubble diagram, block plan, circulation study, preliminary drawings/informative sketches and problem identification lists
  • Furnished Floor Plan – drafted at 1/8″ = 1′-0″ scale or 3/16″ scale (choose one); reflect the design and style through line quality (line weight distinction) and textures; include built-ins and movable furnishings; label each room/space (directly or through keynotes)
  • Lighting and Electrical Plan – drafted at same scale as furnished floor plan; connect switches to light fixtures with dashed lines (arcs); place electrical outlets every 12′-0″ o.c. (on center) except at the kitchen counter top where they are 4′-0″ o.c.; provide outlets as needed for functionality in the office; outlets nearest the sinks must be GFIC; place 120v and 240v outlets correctly; draft all built-in units, cabinetry, appliances and plumbing fixtures; do not draw movable furnishings on this plan; label each room/space (directly or through keynotes); provide a symbol legend
  • Cabinetry Drawings – Custom designed feature cabinet (6′-0″ in height min.); top, front, left, right and one section view at 1/2″ = 1′-0″ scale; two detail views at 3″ = 1′-0″ scale

Process Documentation:

  • Photocopies of all sketches (included in your final Design Process Book)
  • Blog post by date listed below

Digital Files:

Upload the final booklet (saved as a PDF*) to the class dropbox on myACU.

*Prefix the file with your ACU username followed by an underscore (ex: bly95s_project 4.pdf)

Schedule + Deadline

  • Mon., Nov. 14: Project 4 assigned, research, search for inspiration
  • Wed., Nov 16: Bubble diagrams, block plans, circulation studies
  • Fri., Nov 18: Floor plan development
  • Mon., Nov 21: Floor plan development, lighting and electrical plan
  • Wed. – Fri., Nov. 23-25: No Class (Thanksgiving Holiday)
  • Mon., Nov 28: Floor plan, lighting and electrical plan
  • Wed., Nov 30: Plans finalized, cabinetry drawings
  • Fri., Dec 2: Cabinetry drawings
  • Mon., Dec 5: Computer lab – work with digital images/drawings and InDesign
  • Wed., Dec 7: Finalize cabinetry drawings, computer lab and InDesign
  • Fri., Dec 9: Design process and conclusions statement due (post to blog)
  • Thurs., Dec 15: Project due (including comments to blog) for Final Review, 2 – 3:45pm

Grade Weight & Criteria

Project = 25% of final course grade

Link to Grading Criteria

Resources:

DSGN 242: Project 3 – Accessible Bungalow

0 Commentsby   |  10.11.11  |  Assignments, DSGN 242

Overview

This project allows students to role-play, investigate and analyze the specific needs of a wheelchair user and relate those needs to the built environment – specifically the home and work environments.

Assignment

Client Profile

Your client is a single mom with a 10-year-old son. She is a well-known, highly respected painter and illustrator, and recently purchased a charming bungalow built in 1928 to live in and use as a studio. She is also a wheelchair user that has full use of her upper body and is fully self-sufficient limited only by the need for the wheelchair.

House

The existing layout of the bungalow does not adequately meet the unique needs and abilities of your client, and requires renovation to operate efficiently. The final design should include the following spaces/rooms:

  • Living room
  • Eat-in kitchen* (well organized w/dining for four)
  • Master bedroom*
  • Master bathroom* (include roll-in shower w/seat space)
  • Bedroom
  • Studio*
  • Laundry room/closet

Demolition and relocation of interior walls will be required, but you must work within the existing footprint of the townhouse. No changes in the exterior walls are allowed, with the exception of door and/or window changes if deemed necessary.

* Utilize specialized cabinetry

Specifications and General Requirements

  • Interior walls are 3 1/2” wood studs with 1/2” gypsum wallboard on both sides (total thickness = 4 1/2”)
  • Two means of egress (min.) are required, and one is required in the master bedroom
  • Perimeter walls cannot be changed, with the exception of adding exterior door(s)
  • 10′-0″ ceiling height maximum

Barrier-Free Requirements
Kitchen

  • Counter height: 32”
  • Backsplash height: 14” (distance between top of counter and bottom of cabinet above)
  • Knee space: 26-29” clearance at the sink, mixing area, eating surface and cooktop (with caution)
  • Toe space: 9”(h) x 6”(d)
  • Turnaround: 66-72” in kitchen, 60” at changes of direction
  • Cabinet pulls: 18” A.F.F. minimum (no lower)
  • Door levers (no knobs): 3’-0” A.F.F.
  • Reach requirements (maximums)
    • Unobstructed side = 54”
    • Over 24” counter side reach = 44”
    • Unobstructed forward reach = 48”
    • Over 24” counter forward reach = 44”
  • Mobile carts are helpful and have many applications
  • Open shelving is beneficial
  • Helpful space saver conveniences are multi-functional and convertibility

Bath

  • Roll-in shower w/36” opening, 1 1/2” grab bars (x3), non-slip floor, seat or separate showering wheelchair
  • HC toilet w/adequate circulation for transfer, 1 1/2” grab bars (x2), appropriate storage nearby for supplies
  • Roll under sink w/insulated pipes and off-center drain, appropriate storage for vanity needs

All Areas

  • Switch plates, thermostat height: 42” preferred, 48” maximum
  • Pathways: 36” minimum
  • Corridors: 42” minimum
  • Doorways: 32” clear width minimum (pocket doors or double doors are options)
  • Meet clear space required on the latch side of all doors for side or forward approaches
  • Door swings must not encroach on the 60” turnaround diameter by more than 12”
  • 60” diameter turnarounds must be placed as needed
  • Lever handles are required on all doors

Special Requirements

  • Stoops at the entrances must have a flat landing on both sides of the door that accommodates a 60” diameter turnaround
  • 18” x 48” storage space located at the side entrance for inside and outside wheelchairs
  • Ramps have a maximum 1:12 incline ratio and are required at the front and side doors
  • Van is 6’-10” x 15’-6” and has a right side entry

Process:

Final Deliverables

Presentation Materials:

  • 18″ x 24″ Drawing Sheet (vellum or quality drawing paper)
    • Demolition plan @ 1/8″ = 1′-0″
      • Include demolition key w/graphic symbols indicating wall, window and door changes
    • Furnished floor plan @ 1/4″ = 1′-0″ scale
      • Indicate key turn around areas on the plan w/a 60″ dia. circle
      • Include interior elev. symbols (kitchen and master bath), room labels and north arrow
      • Note: Ramps are required from garage and the front sidewalk into house
    • Elevations of kitchen and master bath @ 3/8″ = 1′-0″ scale (10’ max. ceiling height)
      • Max. ceiling height= 10′-0″ / Min. ceiling height = 8′-0″
      • Show the wheelchair user in at least two views
  • 18″ x 24″ Finish Boards (x2, foam core)
    • Include all finishes, materials and colors
    • Schedules (door, window and finish)
    • Design concept narrative
  • Include Title Block on each sheet/board that includes
    • Project name
    • Your name
    • DSGN 242
    • Fall 2011
    • Sheet number (1, 1 of 3, 1/3, etc.)

Process Documentation:

Neatly organize the following process documents in a report binder or folder with your name on it.

  • Photocopies of all sketches/process drawings
  • Completed universal design experience worksheet

Schedule + Deadline

  • Wed., Oct 12: Project 3 assigned
  • Fri., Oct. 14: No Class (Art & Design Visiting Committee), independent progress
  • Mon., Oct 17: Experience wheelchair use, needs list, concept development (bubble diagrams, adjacencies, space planning)
  • Wed., Oct 19: Floor plan and furniture placement (w/barrier-free circulation)
  • Fri., Oct 21: No class (Fall Break), independent progress,
  • Mon., Oct 24: Floor plan and furniture placement
  • Wed., Oct 26: Floor plan and demo plan due – Group critique @ beginning of class, Elevations
  • Fri., Oct 28: Elevations
  • Mon., Oct 31: Elevations, finishes + schedules
  • Wed., Nov 2: Finishes + schedules, presentation drawings
  • Fri., Nov 4: Finalize presentation drawings + materials
  • Mon., Nov 7: Finalize presentation drawings + materials
  • Wed., Nov 9: Design process and conclusions statement due (post to blog)Finalize presentation materials
  • Fri., Nov 11: Project due at the beginning of class – Final Critique

Grading Criteria

Project = 25% of final course grade
Link to Grading Criteria

Resources:

Design Concept Narrative

0 Commentsby   |  10.10.11  |  Assignments

The design concept statement intends to communicate, through writing, the primary concepts utilized in the design. It is often referred to as a narrative and should be approached as such – you are telling a story of the space. What is important about the space and why. What theories, information, approaches, etc. support the decisions you made. Is there an overarching theme or idea that ties everything together?

The design concept statement is not simply a description of elements within the space (the graphic presentation should communicate that adequately), but rather a description of the quality of the space. With that said, please remove yourself from the equation – do not use the word or phrase “I” or “the designer.” This piece of writing is meant to describe the space, not the designer of the space.

The design concept narrative should be between 250 – 300 words.

Student Example

Daniel’s parents want a room where he and his older brother can interact and use their imagination. An existing master bedroom and bathroom in the family’s house are to be remodeled to meet this need. The design of the new suite for Daniel and his brother is a response to Daniel’s specific interests, as well as child development and color theories. The environment created is intended to nurture the brothers’ imagination, learning, growth and personal interests. After interviewing five-year-old Daniel, his interest in flying was clear; therefore, the primary theme of the space is centered on aviation. Antonio Torrice’s theories related to the relationship between color and child development are implemented into the design through the use of yellow, orange, green and blue, which encourage calmness, growth, wellness and speech development. “Centers” were created to provide distinct spaces for the brothers to engage in different activities such as games, puzzles, reading and kinesthetics. Overall the room displays a vibrant array of colors and an aviation motif to encourage and develop their interests, while having the flexibility to change as the brothers age.

Generic Example

A master suite has been adapted and renovated into an interior environment for five-year-old ________ and her sister. The solution is based upon the concepts of “Color, Choice and Convertibility” to fully complement the children’s growth and maturation, and to infuse a personalized design scheme. Guiding concepts for the solution were discovered during an interview with ________. The colors of choice are ________’s favorites: ________, ________ and ________. This spacious suite is designed for varied activities in a ________ theme reflecting the girls’ interests.

The west wall features a carpeted stage and a chest nearby contains dress up clothes. Another feature is a “Leaping Castle,” a three-foot high platform designed for jumping and harmlessly landing onto a large cushioned pillow. The secret to this special Princess castle is a hidden ladder placed inside on the east wall. The stage and castle are easily removed after the girls get older. Convertible, feminine bunk beds extend from the feature centered in the room. Each personalized bed is designed with safety and functionality.

Two paint easels on the south wall satisfy the girls’ creativity. Additionally, a bench and worktable are provided for computer work, homework assignments and art projects. Tile is used as the flooring in the art area for easy cleanup. A window seat is located in front of the large window for warm days and reading, and an adjacent bookcase contains many favorite books. A cabinet secures a wonderful aquarium to the east. The remodeled bathroom contains ample convertible cabinet space. A shower replaces the original bathtub and a new dressing room is located within close proximity to the bathroom and is accessible from two sides. The design solution provides a room full of favorite things according to the concepts of color, choice and convertibility.

Digital Design & Fabrication

0 Commentsby   |  10.09.11  |  Architecture, Interior Design

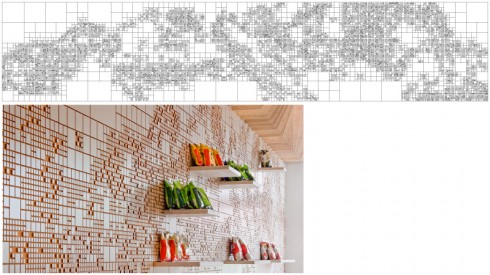
Earl's low relief alpine mural

Digital drawings showing progressive detail

Earl’s Gourmet Grub is an eatery located in Los Angeles. FreelandBuck designed the interior space, including a large low relief mural along one wall of the space. As the second image illustrates, FreelandBuck digitally translated a photo of an alpine landscape into a grid-like pattern using progressively smaller squares to provide more detail. The finished piece uses white maple veneer laminated onto standard sheets of medium-density fiberboard (MDF), which is then precisely cut by a computer numerical control (CNC) milling machine.


Detail of de Young copper panels

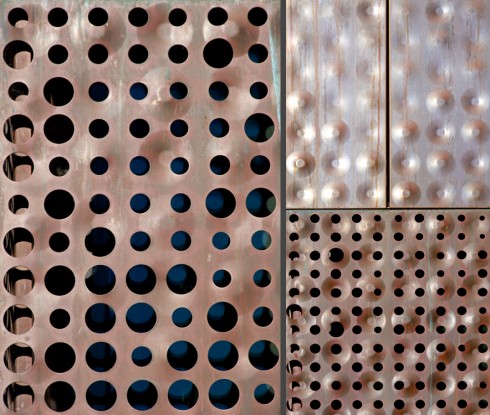
After seeing this project, it reminded me of the de Young museum in San Francisco, which I visited a couple of years ago.The facade of the de Young Museum, designed by Swiss architects Herzog & deMeuron, was created using a similar digitally-informed process. The architects digitally translated images of tree canopies into patterns of circular perforations and indentions, which were then pressed and/or cut into large copper panels. The intent was to replicate the impression of light filtering through a tree canopy, which resonates with the tree-filled park in which the de Young is located.

Here is a recent article from Architectural Record that provides more examples of the use of digital fabrication in architecture and design.

Cinemagraphs

0 Commentsby   |  09.27.11  |  Photography

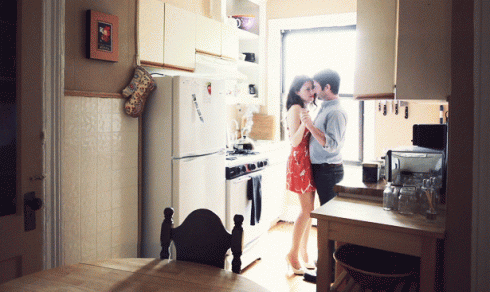
After mentioning the Spirit of Space’s work, which attempts to communicate the emotional experience of architectural space, to a friend, he sent me this link to a set of cinemagraphs. Cinemagraphs are animated photographs that use a single photograph with one portion (or moment as described in the linked article) that is animated. The animation is similar to stop motion where individual frames (photos) are combined in sequence to represent movement. Does that make sense? Well, just go check them out – below is a single frame of one of the cinemagraphs.


Prefab Lattice Construction

0 Commentsby   |  09.26.11  |  Architecture, Reference

While I’m thinking about Studio Gang, the architecture firm designed a 1,400-square-foot open-air pavilion in Chicago’s Lincoln Park Zoo. This is a beautiful example of prefabrication, understanding material properties and fabrication technology.

Here’s a short film by Spirit of Space.


Jeanne Gang named MacArthur Fellow

0 Commentsby   |  09.26.11  |  Architecture, Reference

Jeanne Gang is the 47-year-old founder of Studio Gang Architects in Chicago. Here is a link to a short article/interview with Jeanne and below you’ll find a short interview produced by the MacArthur Foundation.


Photos from Stepping Stones – Fall 2011

0 Commentsby   |  09.23.11  |  DSGN 242, Project Supplemental Info.

DSGN 341: Project 2 – Nova Scotia Cottage

0 Commentsby   |  09.22.11  |  Assignments, DSGN 341

Assignment

Design a small cottage located on the shore of Moshers Bay in Upper Kingsburg, Nova Scotia, Canada. (Potential sites for the cottage will be provided.) Before beginning design, a fundamental understanding of the context is imperative. The context is determined by the people and the place, which are represented through history, culture, geography, landscape, vernacular buildings, local materials and building techniques to name just a few. Since we cannot visit the site for this project, you will need to gain as much information and insight as you can from the resources presented in class and your own research.

Objectives:

  • Understand context and its ability to inform a design project
  • Analyze site conditions (topography, wind, sun, natural forms/elements, views, access)
  • Continue to explore the relationship between space and form
  • Explore material culture and its influence on design
  • Understand fundamentals of building construction
  • Continue experimenting with tectonic expression
  • Explore drawing composition
  • Develop design process
  • Develop technical skills including model-building and sketching
  • Utilize digital tools for design and visualization
  • Increase visual and oral communication skills

Design Requirements:

The cottage should not exceed 650 square feet (interior space) and must include the following spaces:
  • Living/eating/relaxing space
  • Sleeping space (x2)
  • Bathroom
  • Kitchen
  • Storage closet(s)
  • Porch (1 min.)

Design Process:

Here’s how we’re going to do this thing.*

  1. Gather relevant contextual information. Print and organize this information so it is easy for you to access. Surround yourself with it and bring it to every class meeting. Seriously, this information is very important.
  2. Develop a parti (organizing concept) that relates the building to the site.
  3. Further develop the parti to address the spaces within the building – still thinking about the connection to the site.
  4. Translate the parti into building drawings (plans, elevations and sections to scale). This is a fluid process which requires you to constantly go back and evaluate your original parti and adapt as needed. Remember, the parti is really a starting point for design development. The building may end up looking much like the parti, but not necessarily.
  5. Build a small study model to better understand massing, fenestration (openings), form and daylighting.
  6. Think about structure. Draw building sections and important details. Don’t be scared, just do it. (I’ll help.)
  7. At this point you are probably tired, but encouraged by all the great progress you’ve made. Also, you should not have touched the computer! (Okay, maybe you used the computer to gather information, print images and possibly a site plan to work from. Other than that, you don’t need it yet. Trust me.)
  8. Now that you have developed a definitive direction, you can use the computer to refine your drawings.
  9. Put together a comprehensive presentation that represents your building’s contribution to the context. In other words, don’t just show drawings of a building, but paint a picture of a specific place.
  10. Build a presentation model.
  11. Sleep.

* Throughout the process, please remember to stay adequately hydrated and nourished, get fresh air and listen to the birds, and look for inspiration everywhere.

Reading, Writing + Sketching

  • Reading: Basics Design Ideas, pgs. 39-62, Basics Design and Living, pgs. 9-52
  • Writing: 1 Blog Post and 2 Comments (see Writing Requirements)
  • Sketches: 25 min.

Final Deliverables

Presentation sheet(s) that contains the following:

  • Precedent and other inspirational visuals that informed design decisions
  • Parti (sketch)
  • Floor plan*
  • Elevations*
  • Building Sections* (2 min.)
  • Exterior perspective view (Composite image w/SketchUp model, 2 min.)
*Final drawings completed by hand using digital info. as underlay. Include scale figures in elevations and sections.

Note: Size of sheet and scale of drawings TBD.

Scale Model:

  • Scale: 1/4″ = 1′-0″
  • Make sure it is finely crafted! (Keep a sharp blade and use your drawings as templates.)
  • Use chipboard, illustration board or museum board – NO FOAM CORE
  • You can also use basswood. Especially useful for smaller details (such as window frames).
  • Create a base for the model that shows topography

Process Documentation:

  • Photocopies of sketches (place in report binder or folder w/your name on it)
  • Study model
  • Writing (post to blog on specified date below)

Digital Files:

  • Upload the presentation sheet (saved as a high quality PDF*) to your drop.io site.

*Prefix each file with your ACU username followed by an underscore (ex: bly95s_project 2.pdf)

Schedule + Deadline

Week 1

  • Thurs., Sept 22: Introduce project, discuss context, watch McKay-Lyons video

Week 2

  • Tues., Sept 27: Continue discussion of context, work day
  • Thurs., Sept 29: Work day, desk crits

Week 3

  • Tues., Oct 4: Work day, desk crits
  • Thurs., Oct 6: Small group critique @ beginning of class, work day

Week 4

  • Tues., Oct 11: Mid-Project Critique (bring everything you have)
  • Thurs., Oct 13: Begin drawings and model for presentation

Week 5

  • Tues., Oct 18: Work on presentation materials
  • Thurs., Oct 20: Work on presentation materials

Week 6

  • Tues., Oct 19: Print presentation for review (fit to page on 11″ x 17″ sheet) @ beginning of class
  • Thurs., Oct 21: Project due @ beginning of class (including blog post*) – Final Critique

* Comments to classmates’ blog posts are due by the next class meeting Tues., Oct 27.

Grading Criteria

Project = 30% of final course grade
Link to Grading Criteria

Resources

Photos from ACS Pre-K – Fall 2011

0 Commentsby   |  09.20.11  |  DSGN 242, Project Supplemental Info.

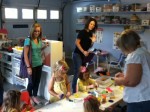
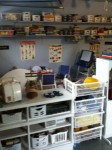
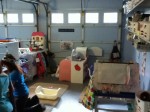
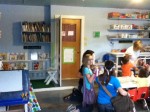
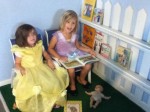
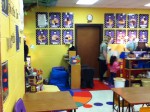
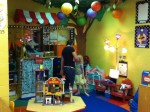
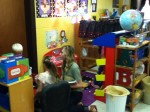
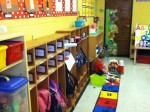
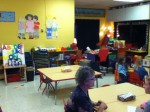
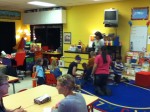
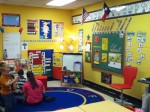
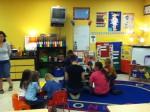
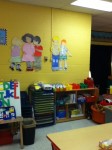
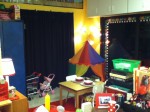
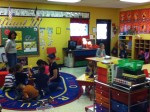
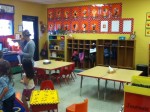
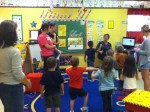
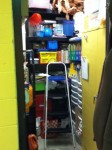
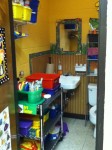
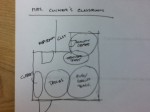
Here are some photos I took during our visit to Abilene Christian School’s Pre-K classes.