Archive for ‘DSGN 242’

DSGN 242: Project 4 – Empty Nest Condominium

0 Commentsby   |  11.14.11  |  Assignments, DSGN 242

Objectives

The student will investigate and implement a design solution with regard for:

  • Exploration of options for renovation of an existing space into a mixed-use environment
  • Identification of client needs and development of a problem statement
  • Functional aspects related to needs for “aging in place” and the elderly
  • Efficiency aspects within an office in which functionality and aesthetic responses reflect the particular client scenario
  • Unique structural and building system parameters of a high-rise environment
  • Conceptual development of stylistic preferences specified by the client
  • Development of a multipurpose commercial space that showcases a notable anthropology career shared with a non-profit service endeavor
  • Creation of lighting and electrical plans supported by legends that serve specific needs of the client
  • Compilation of a presentation in a bound format

Assignment

Client Profile

Mr. & Mrs. Juan Javier Alvarado Jimenez have hired you to assist them with the development of a design solution in which the couple’s current residence in Santa Barbara, California will be renovated into a living and gallery environment. Mr. & Mrs. Alvarado Jimenez’s children are grown and each has a family and home of their own in the same city. In the design, the couple asks that you reconfigure and divide the current living space to combine residential living with an office-like space. Mr. Alvarado Jimenez is retiring from his work as an archeologist, and he wishes to showcase and share his personal collection in an office/gallery setting within the condo. For some time now, he has had increasing health difficulties due to his age (75) and diabetes. Re-establishing his office adjacent to the living space will allow him to eliminate monthly lease fees for his current office space.

Mr. & Mrs. Alvarado Jimenez are native Argentinians and are passionate for their homeland. Mrs. Garcia de Alvarado (Cecilia) is an active supporter of non-profit charities and foundations who assist the homeless in producing and selling their own artwork. She plans to showcase some of the artwork in both the living and office environment. The office space will provide a space in which Cecilia can easily share her husband’s part-time personal assistant. Additionally, both of them will be able to host events and receive guests in the general office space for meetings and small social gatherings.

Because this is a high-rise, the exterior of the building must maintain its cohesive integrity. The 8th floor apartment looks out on a view of the California coastline. The couple anticipates an aesthetically pleasing design solution that accommodates the unique purposes of each space and their preference for showcasing their personal interests and style.

Criteria for Living Environment (consider “aging in place” needs)

  • Private Entry – branch off common elevator lobby
  • Living Room – seating for four (min.), tables, collectibles (a TV is not needed and electronics should be placed inconspicuously within cabinetry)
  • Kitchen + Dining – minimal kitchen and dining for two; appliances needed: wall oven, cook top, small refrigerator, microwave and dishwasher; adequate storage space; trash disposal bins are located in the common area beyond the tenant space
  • Master Suite – Queen-size bed, bedside table(s) or cabinet surface, 6′-0″ dresser, chest, relaxed seating for two, closet space with 10 linear feet of single rod and 7 linear feet of double rods, personal vault for valuables
  • Master Bath – tub/shower, toilet, double vanity, linen and toiletry storage
  • Laundry – a compact laundry is requested, provide small washer and dryer, minimal household supplies, compact ironing/steam equip.

Criteria for Office Environment

  • Separate Entry – branch off common elevator lobby, develop with attention to professional ambiance
  • Office Space for Personal Assistant – desk with adequate work space, computer/monitor/keyboard/printer, telephone, fax machine, four-drawer lateral file (x1), desk chair, inconspicuous business supply storage
  • Multi-Purpose Waiting, Conference and Socializing Room – spacious, include a movable table and seating for up to four, showcase art from Mrs. Alvarado Jimenez’s charity work Mr. Alvarado Jimenez’s archaeological collection in a gallery-like setting
  • Executive’s Private Office – eight linear feet of shelving, standard executive desk, telephone, two-drawer lateral file (may be combined with credenza unit), desk chair and comfortable guest seating for one
  • Non-Profit Office Accommodations – standard desk accommodations with 4′-0″ of shelving and one vertical file, desk chair, telephone, laptop computer, printer, one guest chair and a 3′ x 4′ closet for storage of various items related to her volunteer work
  • Coat Closet and Mini Refreshment Station (concealed)
  • Powder Room – toilet, lavatory and minimal storage; though small, this room should be interesting and ADA accessible

The Building

  • Ten-story steel structure with windows on all sides
  • Entrance to the eighth floor tenant space is via the elevator, which opens into both the parking garage and the building lobby. A fire exit is located within close proximity of the tenant space as well.
  • Existing windows must remain as indicated on the floor plan. New walls may intersect at window mullions.
  • Plumbing should back up to walls with marked plumbing chases or branch overhead from a plumbing chase.
  • Windows are operable. Glazing is from the ceiling down to 1′-6″ A.F.F. (above finished floor).

The Interior

  • New interior walls are 3 5/8″ metal studs with 5/8″ gypsum board on both sides (for purposes of this project, draw new interior walls at 5″ thick).
  • The floor is structural concrete and cannot be punctured.
  • The existing ceiling height is 9′-10″ A.F.F., which will remain as the maximum ceiling height.
  • There is a 2′-0″ plenum space for HVAC, electrical, sprinklers and lighting above the ceiling.
  • The bedroom shall have an operable window in an exterior wall for fire safety.
  • All doorways and each bathroom/restroom must be wheelchair accessible.

Required Process Documentation:

Final Deliverables

Presentation Materials:

The following requirements to be assembled in a n 11″ x 17″ spiral-bound booklet (link to template is below under “Resources.” Each student will submit a printed and bound copy as well as a digital version (saved as a PDF – see below for details).

  • Written Problem Statement – describe the client’s needs and requirements
  • Design Concept Statement – describe the proposed solution and its ability to meet the client’s needs and requirements
  • Design Concept Imagery – assemble visuals (either digitally or physically) that portray the design concept direction for the living and office spaces (one page for each)
  • Design Process – clearly illustrate the design process, visuals can include: bubble diagram, block plan, circulation study, preliminary drawings/informative sketches and problem identification lists
  • Furnished Floor Plan – drafted at 1/8″ = 1′-0″ scale or 3/16″ scale (choose one); reflect the design and style through line quality (line weight distinction) and textures; include built-ins and movable furnishings; label each room/space (directly or through keynotes)
  • Lighting and Electrical Plan – drafted at same scale as furnished floor plan; connect switches to light fixtures with dashed lines (arcs); place electrical outlets every 12′-0″ o.c. (on center) except at the kitchen counter top where they are 4′-0″ o.c.; provide outlets as needed for functionality in the office; outlets nearest the sinks must be GFIC; place 120v and 240v outlets correctly; draft all built-in units, cabinetry, appliances and plumbing fixtures; do not draw movable furnishings on this plan; label each room/space (directly or through keynotes); provide a symbol legend
  • Cabinetry Drawings – Custom designed feature cabinet (6′-0″ in height min.); top, front, left, right and one section view at 1/2″ = 1′-0″ scale; two detail views at 3″ = 1′-0″ scale

Process Documentation:

  • Photocopies of all sketches (included in your final Design Process Book)
  • Blog post by date listed below

Digital Files:

Upload the final booklet (saved as a PDF*) to the class dropbox on myACU.

*Prefix the file with your ACU username followed by an underscore (ex: bly95s_project 4.pdf)

Schedule + Deadline

  • Mon., Nov. 14: Project 4 assigned, research, search for inspiration
  • Wed., Nov 16: Bubble diagrams, block plans, circulation studies
  • Fri., Nov 18: Floor plan development
  • Mon., Nov 21: Floor plan development, lighting and electrical plan
  • Wed. – Fri., Nov. 23-25: No Class (Thanksgiving Holiday)
  • Mon., Nov 28: Floor plan, lighting and electrical plan
  • Wed., Nov 30: Plans finalized, cabinetry drawings
  • Fri., Dec 2: Cabinetry drawings
  • Mon., Dec 5: Computer lab – work with digital images/drawings and InDesign
  • Wed., Dec 7: Finalize cabinetry drawings, computer lab and InDesign
  • Fri., Dec 9: Design process and conclusions statement due (post to blog)
  • Thurs., Dec 15: Project due (including comments to blog) for Final Review, 2 – 3:45pm

Grade Weight & Criteria

Project = 25% of final course grade

Link to Grading Criteria

Resources:

DSGN 242: Project 3 – Accessible Bungalow

0 Commentsby   |  10.11.11  |  Assignments, DSGN 242

Overview

This project allows students to role-play, investigate and analyze the specific needs of a wheelchair user and relate those needs to the built environment – specifically the home and work environments.

Assignment

Client Profile

Your client is a single mom with a 10-year-old son. She is a well-known, highly respected painter and illustrator, and recently purchased a charming bungalow built in 1928 to live in and use as a studio. She is also a wheelchair user that has full use of her upper body and is fully self-sufficient limited only by the need for the wheelchair.

House

The existing layout of the bungalow does not adequately meet the unique needs and abilities of your client, and requires renovation to operate efficiently. The final design should include the following spaces/rooms:

  • Living room
  • Eat-in kitchen* (well organized w/dining for four)
  • Master bedroom*
  • Master bathroom* (include roll-in shower w/seat space)
  • Bedroom
  • Studio*
  • Laundry room/closet

Demolition and relocation of interior walls will be required, but you must work within the existing footprint of the townhouse. No changes in the exterior walls are allowed, with the exception of door and/or window changes if deemed necessary.

* Utilize specialized cabinetry

Specifications and General Requirements

  • Interior walls are 3 1/2” wood studs with 1/2” gypsum wallboard on both sides (total thickness = 4 1/2”)
  • Two means of egress (min.) are required, and one is required in the master bedroom
  • Perimeter walls cannot be changed, with the exception of adding exterior door(s)
  • 10′-0″ ceiling height maximum

Barrier-Free Requirements
Kitchen

  • Counter height: 32”
  • Backsplash height: 14” (distance between top of counter and bottom of cabinet above)
  • Knee space: 26-29” clearance at the sink, mixing area, eating surface and cooktop (with caution)
  • Toe space: 9”(h) x 6”(d)
  • Turnaround: 66-72” in kitchen, 60” at changes of direction
  • Cabinet pulls: 18” A.F.F. minimum (no lower)
  • Door levers (no knobs): 3’-0” A.F.F.
  • Reach requirements (maximums)
    • Unobstructed side = 54”
    • Over 24” counter side reach = 44”
    • Unobstructed forward reach = 48”
    • Over 24” counter forward reach = 44”
  • Mobile carts are helpful and have many applications
  • Open shelving is beneficial
  • Helpful space saver conveniences are multi-functional and convertibility

Bath

  • Roll-in shower w/36” opening, 1 1/2” grab bars (x3), non-slip floor, seat or separate showering wheelchair
  • HC toilet w/adequate circulation for transfer, 1 1/2” grab bars (x2), appropriate storage nearby for supplies
  • Roll under sink w/insulated pipes and off-center drain, appropriate storage for vanity needs

All Areas

  • Switch plates, thermostat height: 42” preferred, 48” maximum
  • Pathways: 36” minimum
  • Corridors: 42” minimum
  • Doorways: 32” clear width minimum (pocket doors or double doors are options)
  • Meet clear space required on the latch side of all doors for side or forward approaches
  • Door swings must not encroach on the 60” turnaround diameter by more than 12”
  • 60” diameter turnarounds must be placed as needed
  • Lever handles are required on all doors

Special Requirements

  • Stoops at the entrances must have a flat landing on both sides of the door that accommodates a 60” diameter turnaround
  • 18” x 48” storage space located at the side entrance for inside and outside wheelchairs
  • Ramps have a maximum 1:12 incline ratio and are required at the front and side doors
  • Van is 6’-10” x 15’-6” and has a right side entry

Process:

Final Deliverables

Presentation Materials:

  • 18″ x 24″ Drawing Sheet (vellum or quality drawing paper)
    • Demolition plan @ 1/8″ = 1′-0″
      • Include demolition key w/graphic symbols indicating wall, window and door changes
    • Furnished floor plan @ 1/4″ = 1′-0″ scale
      • Indicate key turn around areas on the plan w/a 60″ dia. circle
      • Include interior elev. symbols (kitchen and master bath), room labels and north arrow
      • Note: Ramps are required from garage and the front sidewalk into house
    • Elevations of kitchen and master bath @ 3/8″ = 1′-0″ scale (10’ max. ceiling height)
      • Max. ceiling height= 10′-0″ / Min. ceiling height = 8′-0″
      • Show the wheelchair user in at least two views
  • 18″ x 24″ Finish Boards (x2, foam core)
    • Include all finishes, materials and colors
    • Schedules (door, window and finish)
    • Design concept narrative
  • Include Title Block on each sheet/board that includes
    • Project name
    • Your name
    • DSGN 242
    • Fall 2011
    • Sheet number (1, 1 of 3, 1/3, etc.)

Process Documentation:

Neatly organize the following process documents in a report binder or folder with your name on it.

  • Photocopies of all sketches/process drawings
  • Completed universal design experience worksheet

Schedule + Deadline

  • Wed., Oct 12: Project 3 assigned
  • Fri., Oct. 14: No Class (Art & Design Visiting Committee), independent progress
  • Mon., Oct 17: Experience wheelchair use, needs list, concept development (bubble diagrams, adjacencies, space planning)
  • Wed., Oct 19: Floor plan and furniture placement (w/barrier-free circulation)
  • Fri., Oct 21: No class (Fall Break), independent progress,
  • Mon., Oct 24: Floor plan and furniture placement
  • Wed., Oct 26: Floor plan and demo plan due – Group critique @ beginning of class, Elevations
  • Fri., Oct 28: Elevations
  • Mon., Oct 31: Elevations, finishes + schedules
  • Wed., Nov 2: Finishes + schedules, presentation drawings
  • Fri., Nov 4: Finalize presentation drawings + materials
  • Mon., Nov 7: Finalize presentation drawings + materials
  • Wed., Nov 9: Design process and conclusions statement due (post to blog)Finalize presentation materials
  • Fri., Nov 11: Project due at the beginning of class – Final Critique

Grading Criteria

Project = 25% of final course grade
Link to Grading Criteria

Resources:

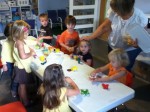
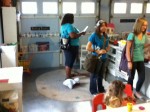
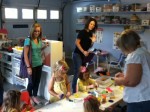
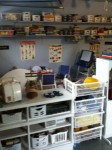
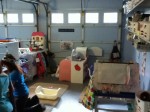
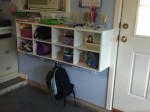
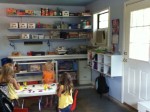
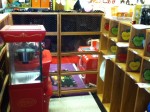
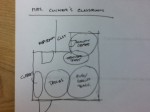
Photos from Stepping Stones – Fall 2011

0 Commentsby   |  09.23.11  |  DSGN 242, Project Supplemental Info.

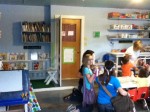
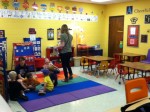
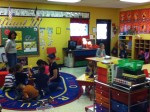
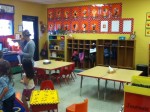
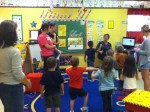
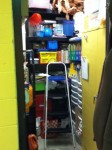
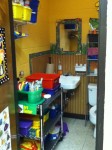
Photos from ACS Pre-K – Fall 2011

0 Commentsby   |  09.20.11  |  DSGN 242, Project Supplemental Info.

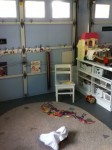
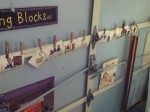
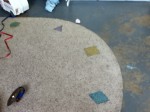
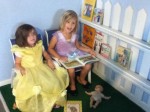
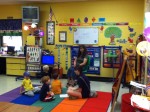
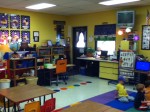
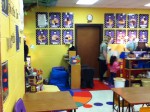
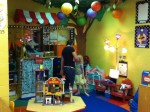
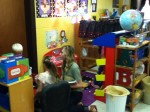
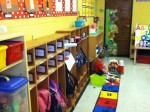
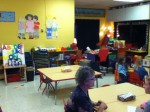
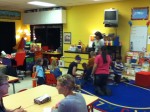
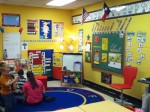
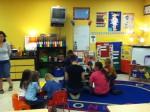
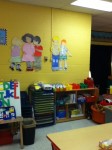
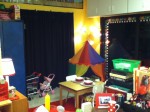
Here are some photos I took during our visit to Abilene Christian School’s Pre-K classes.

DSGN 242: Project 2 – Environment for Children

0 Commentsby   |  09.15.11  |  Assignments, DSGN 242

Overview

In today’s society, more and more children attend some form of preschool or child care before they begin their formal education, which is typically marked by kindergarten. Preschool and kindergarten place much significance on children’s play as a critical developmental tool. (The concept of kindergarten, “child’s garden,” originated in Germany by Fredrich Froebel. This project requires each student to develop a design concept for a single preschool classroom that accommodates 20 three- to five-year-olds. The space needs to facilitate a variety of small group and individual activities, including block-building, sociodramatic play, art, music, science, math, manipulatives (puzzles and games) and quiet reading and writing. These activity areas should be clearly defined by the spatial arrangement and clear pathways need to be provided for children to move from area to area with minimal distraction. Of course, the design needs to meet the needs of children (esp. when considering equipment, furniture and finishes) while providing an inviting and fun learning environment.

Assignment

Part 1: Research

Begin the project by learning about designing for children. In addition to considering the size of your client, which dictates certain dimensional criteria, we also need to consider the effect of color, types of spaces/zones needed and their adjacencies, circulation/pathways, surfaces and storage needs. I have provided a list of resources below to get you started, but please do not feel limited to this list.

Part 2: Observe and Interview

This step is a continuation of the first and will provide first-hand experience of a pre-k classroom environment. Our class will visit Abilene Christian School’s preschool classes providing you the opportunity to see examples of preschool classrooms, observe the children and teachers using the space and talk with them about their likes and dislikes. Click here for the questionnaire.

Part 3: Design an Environment for Children

Using the drawings provided, design an environment for a preschool classroom (20 three- to five-year-olds) taking into consideration insight gained from the observation and interviews. The design should strive to meet the following goals:

  • Visually rich, fun and surprising
  • Provide spaces and surfaces for display of children’s work
  • Provide a variety of settings for work-in-progress
  • Introduce a variety of social setting for small and large groups
  • Make strong connections between the indoors and outdoors (use daylighting as much as possible)
  • Connect spaces to promote communication, orientation and flexible programming and staffing
  • Build in flexibility of space to accommodate evolving teaching practices
  • Create a distinctive and pleasing entrance
  • Eliminate physical barriers and isolation
  • Pay special attention to the scale and height of typical elements such as windows, doors, doorknobs and pulls, sinks, toilets, counters, furnishings, mirrors, steps, shelving and storage, light switches, towel dispensers and other accessories (anthropometrics for children)

The design should include spaces that accommodate the following activities:

  • Group Instruction
  • Group Reading
  • Wet Area (for projects/art)
  • Small Group Area
  • Work Area for Teacher
  • Storage
  • Restroom

Process:

Final Deliverables

Presentation Materials:

  • 18″ x 24″ Drawing Sheet (vellum or quality drawing paper)
    • Furnished floor plan @ 1/4″ = 1′-0″ scale (include electrical symbols and legend)
    • Elevations of all walls @ 1/4″ = 1′-0″ scale (10’ max. ceiling height)
  • 18″ x 24″ Finish Board (foam core)
    • Include all finishes, materials and colors
    • Design concept narrative (detail the implementation of color, choice and convertibility)
  • Include Title Block on each sheet/board that includes (hand lettered on drawing sheets)
    • Preschool Classroom
    • Your name
    • DSGN 242
    • Fall 2011
    • Sheet number (1, 1 of 2, 1/2, etc.)

Process Documentation:

Neatly organize the following process documents in a report binder or folder with your name on it.

  • Photocopies of all sketches/process drawings
  • Completed interview questionnaire

Schedule + Deadline

  • Fri., Sept 16: Project 2 assigned, introduction to designing for children
  • Mon., Sept 19: No Class – Attend Summit and Post to Blog
  • Wed., Sept 21: Observe and interview children and teachers at Abilene Christian School
  • Fri., Sept 23: Ideation, bubble diagrams, design concept development
  • Mon., Sept 26: Design concept development
  • Wed., Sept 28: Furnished floor plan due (can be on trace) – Group critique @ beginning of class, identify material and color and concepts
  • Fri., Sept 30: No Class
  • Mon., Oct 3: Elevations
  • Wed., Oct 5: Elevations, finish selections formalized
  • Fri., Oct 7: Elevations due (can be on trace), Work on presentation drawings + materials
  • Mon., Oct 10: Design process and conclusions statement due (post to blog), Work on presentation drawings + materials
  • Wed., Oct 12: Project due at the beginning of class – Final Critique

Link to Grading Criteria

Resources

DSGN 242: Project 1 – Space, Scale + Light

0 Commentsby   |  08.26.11  |  Assignments, DSGN 242

Overview

Space constantly encompasses our being. Through the volume of space, we move, see forms, hear sounds, feel breezes, smell the fragrances of a flower garden in bloom. It is a natural substance like wood or stone. yet it is an inherently formless vapor. Its visual form, its dimensions and scale, the quality of its light – all of these qualities depend on our perception of the spatial boundaries defined by elements of form. – Francis Ching “Architecture: Form, Space and Order”

The primary elements of form are:

  • Point – indicates a position in space
  • Line – a point extended that has length, direction and position
  • Plane – a lined extended that has length, width, shape, surface, orientation and position
  • Volume – a plane extended that has length, width, depth, form, space, surface, orientation and position

Objectives

  • Explore the creation of space using the primary elements of form
  • Understand the effect scale has on the perception of space
  • Examine the quality of light and its use as a “material”
  • Develop design process
  • Develop technical skills including model-building, sketching and hand drafting
  • Introduce page layout design elements (including: grid/organization systems, orientation, visual unity and balance, information sequence and hierarchy)
  • Utilize digital tools for final composition

Assignment

Part 1: Physical Models

In order to focus on the creation of physical space and study of solid + void, create three separate physical models that combine the following elements to form spaces:

  1. Planar elements (membranes) – curved and straight
  2. Planar and linear elements (rod, bar, cable, etc.)
  3. Planar and volumetric elements (cube, cylinder, sphere, etc.)

The models must meet the following requirements:

  • Not to exceed 4″w x 6.5″d x 4″h.
  • Mount models on a rectangular base that measures 6″ x 8.5″ (should be approved material – see below)
  • Approved materials: cardboard, chipboard, matboard or foam core – wire, dowels or string can be used for linear elements
  • One or two materials p/model maximum

Part 2: Scale + Light

Scale completes the sense of space by providing a familiar reference and context, the human body. Adding scale figures to a model renders it less abstract and more concrete. Light serves as an additional material that conveys a sense of space – space that is transformed through the passage of time.

  1. Create three scale figures @ different sizes – 1/8″, 1/4″, and 1/2″ (example here)
  2. Place the figures (one size at a time) in each model and observe the effect each has on the perception of space
  3. Cast light on the models from a variety of vantage points. Natural light (sunlight) is the preferred source, but the use of artificial light is acceptable as well. Observe how light changes the nature of the space and becomes its own material.
  4. Choose one model and one scale figure you feel best relate to one another

Part 3: Representation

Space has been created, scale and light have been examined – now the work needs to be documented and re-presented through drawings and photographs.

  • Photograph the nature of the space as the perspective and light changes.* Ensure the scale figure is visible in each photograph.
  • Using the photographs as reference and/or underlays, freehand sketch three perspectives of the space. Let the drawing emote the quality of the space through the use of light, shadow, line quality, texture, scale, etc.
  • Draft two sections (one in each direction) of the model @ actual size
  • Incorporate drawings, photographs and appropriate labels into an 18″ x 24″ presentation sheet

*In order to reduce distractions, keep the background as neutral as possible. Use a solid backdrop, such as a large piece of paper, sheet, foam core, etc. to eliminate background “noise.”

Process:

  • Inspiration: Find at least two images of spaces/forms p/model type as inspiration (six total)
  • Models: Three process (one will be the final)
  • Sketches: 10 min. p/model type (30 total)
  • Photographs: Eight of the final model

Final Deliverables

The final composition will be a single 18″ x 24″ vellum sheet, which includes the following:

  • Three perspective sketches w/scale figures
  • 2 section drawings w/labels and graphic scale (use architectural lettering)
  • Project name (Space, Scale + Light), student name, class and semester (use architectural lettering)

Process Documentation:

  • Three physical models w/scale figure
  • Inspiration images – post to the Class Discussion Blog (send an e-mail to: 1210_DSGN24201@blogs.acu.edu)
  • Photocopies of sketches*
  • Photographs – upload to the class dropbox on myACU. Name each file as follows: first initial.last name_project 1-photo1.jpg (ex: b.young_project 1-photo 1.jpg)
* Place in report binder or folder w/your name on it

Schedule + Deadline

  • Mon., Aug 29: Introduce project
  • Wed., Aug 30: Inspiration examples due
  • Fri., Sept 2: All sketches due @ beginning of class, work on models
  • Mon., Sept 5: Work on models
  • Wed., Sept 7: Models due, group critiques @ beginning of class, work on drawings
  • Fri., Sept 9: Work on drawings
  • Mon., Sept 12 & Wed., Sept 14: Service Project (tentative)
  • Fri., Sept 16: Project due @ beginning of class – Final Critique

Grading Criteria

Project = 15% of final course grade
Link to Grading Criteria