You can now add a Zoom meeting for office hours, guest lectures, study groups or presentations.
Here is what you do to get started. Please note that some of the sequences and screens after step 5 may change based on what you do, or whether you have used Zoom in the past. Test it at least once before your real meeting.
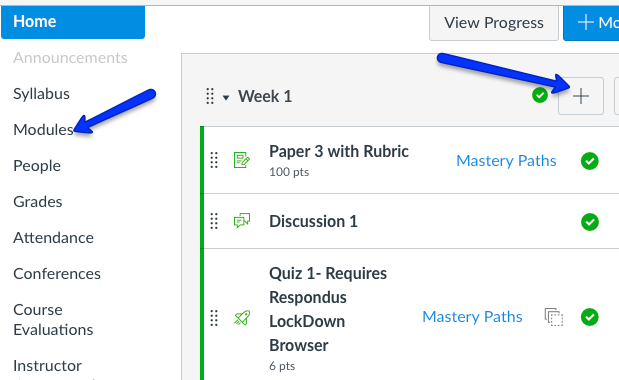
- In your Canvas course, go to “modules“;
- Find the appropriate module to add a Zoom meeting to, or create a module if you do not have one;
- Click on the “+” button;
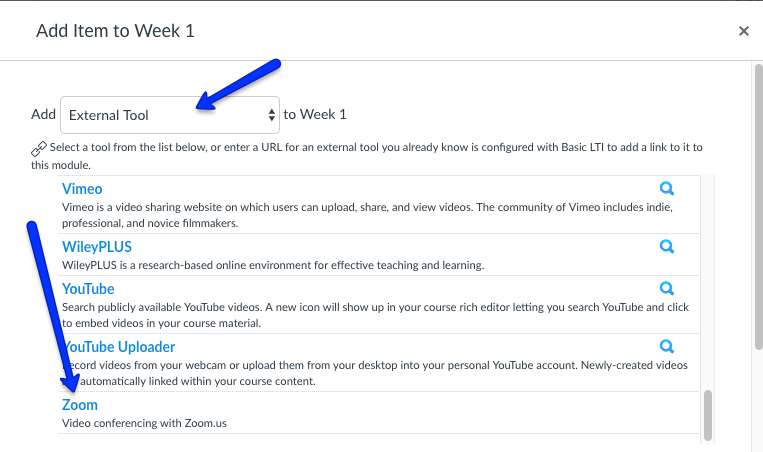
- From the drop-down menu, choose “external tools“, look for “Zoom“, and select it;
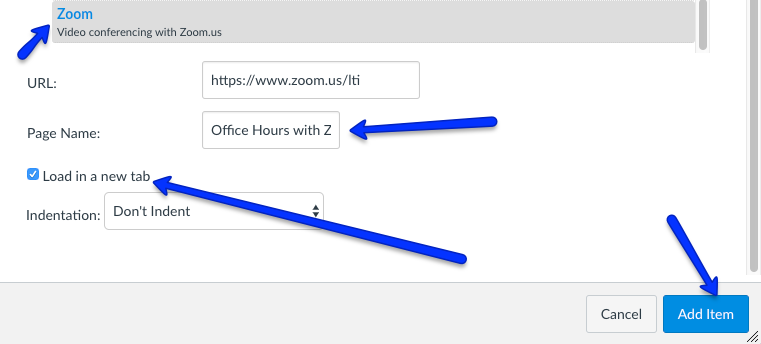
- Give the Zoom meeting a name, and add it. Remember it does not have to be called “Zoom” if students do not know what that is.
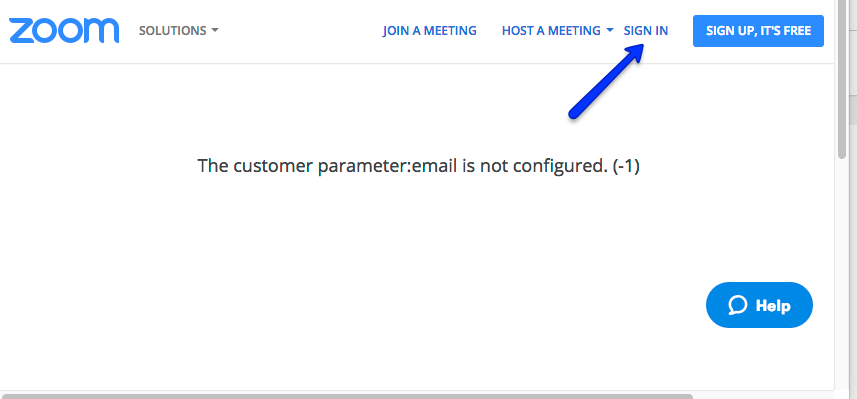
- After the page is created, click on the link. When the following page shows up, choose, “sign in,” as Zoom is integrated into Canvas through the single sign on (SSO) method.
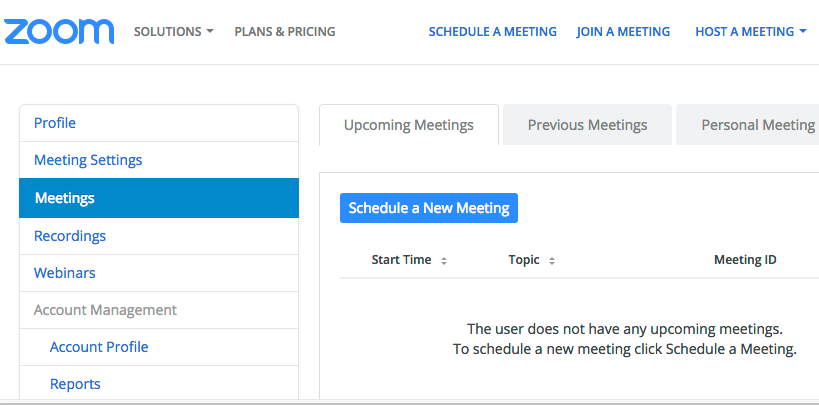
9. In the Zoom interface, create “schedule a new meeting.” Zoom has a nice tutorial on the options you have if you want to learn more.
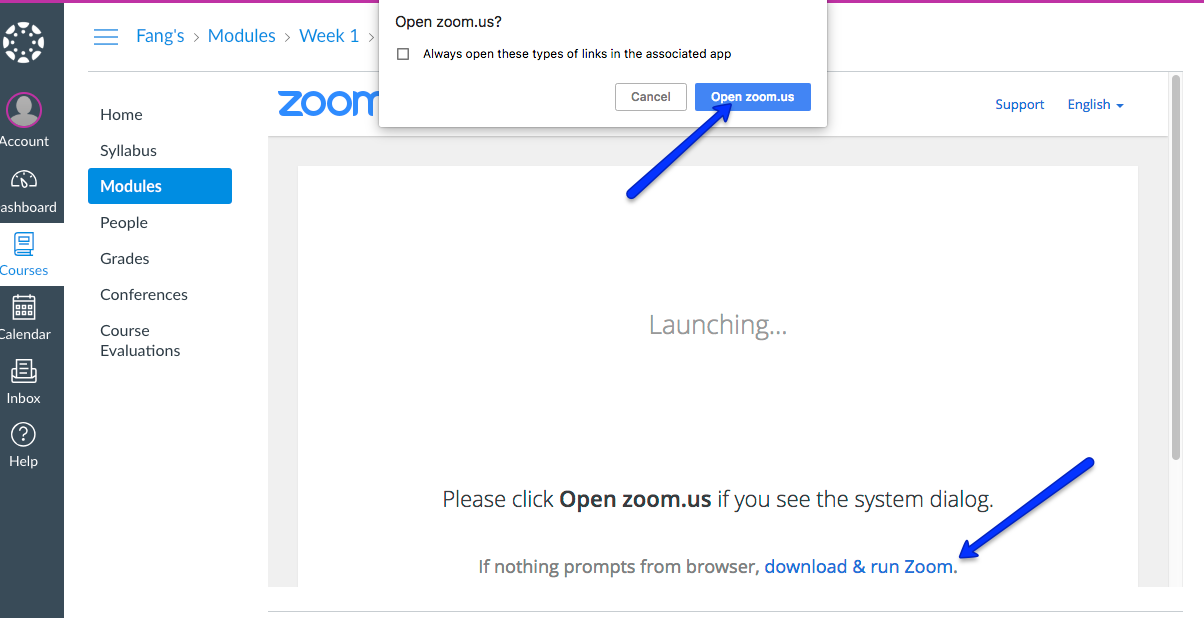
 10. When you are ready to run the meeting, click on the link you created to start the meeting. When you see the following page, click on “Open zoom.us”. If this is the first time for you to use Zoom, you may be asked to download & run Zoom, as shown below.
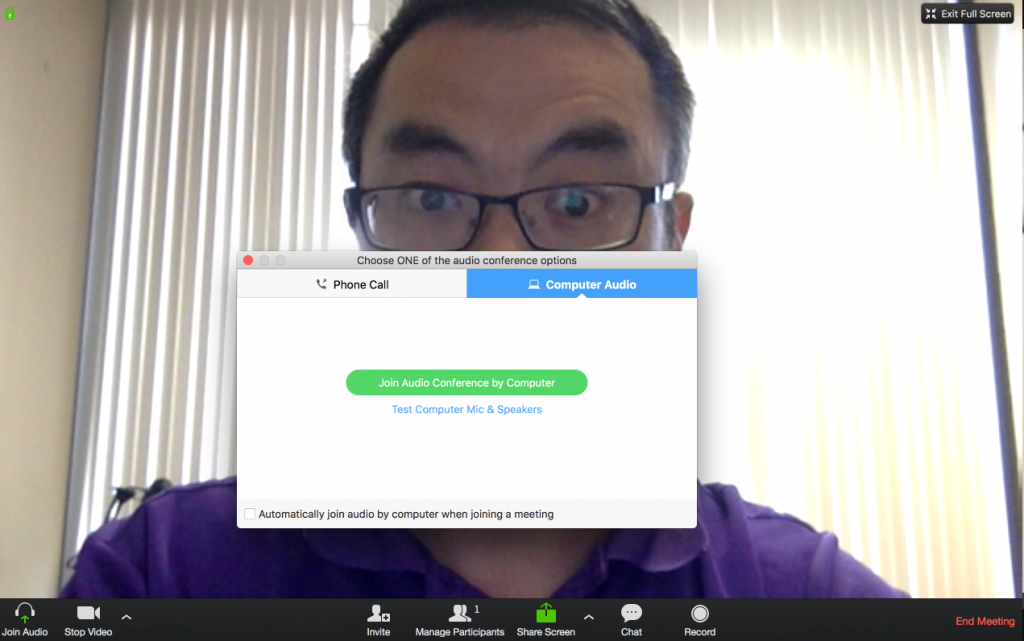
11. You will then see a screen for you to start the Zoom conference. When you see the screen below, click on the option to join by computer or phone call, based on how your professor set it up. To take full advantage of the video or screensharing features, we encourage you and students to join by computer. This is especially true if you have things to show to students on the screen.
Also, check the Zoom tutorial page to learn how to join a Zoom meeting or schedule a meeting.
Here is a tutorial that shows students how to use Zoom meetings in Canvas. You can also copy the following link and QR code to add to your course:
https://bit.ly/2sHqtaX